Chrysalidocarpus leucomallus: A comprehensive Growing Guide for Enthusiasts & Collectors.
Share
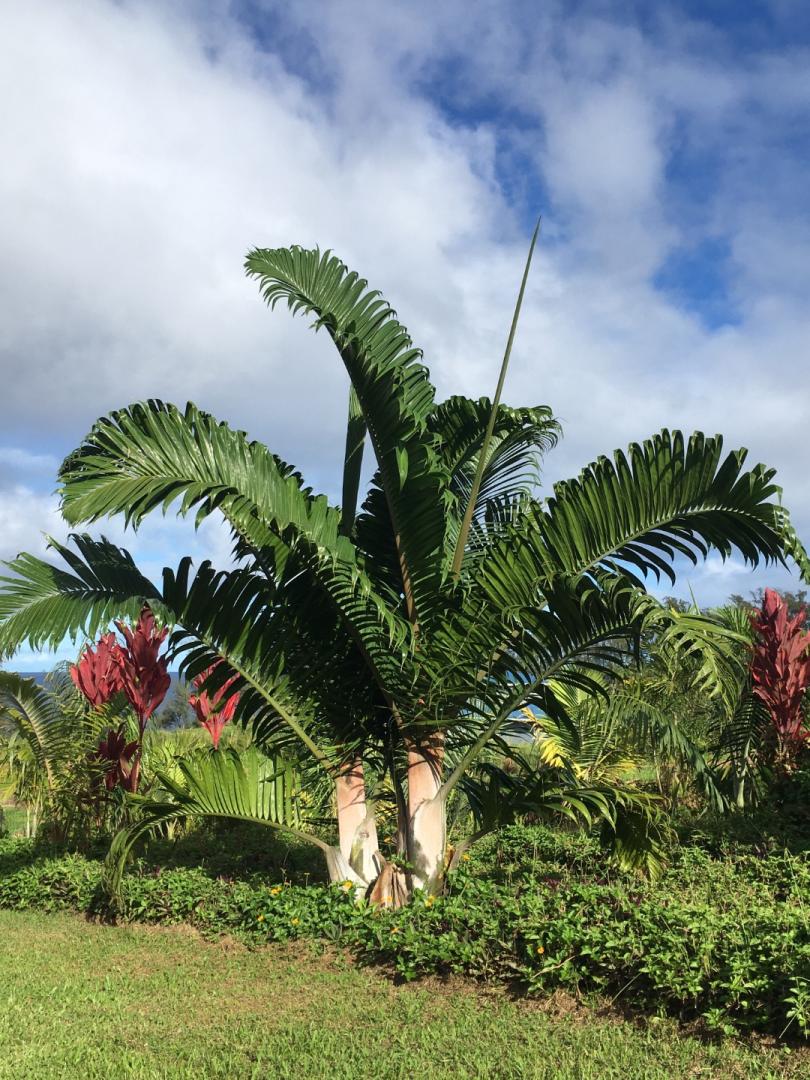
Chrysalidocarpus leucomallus
1. Introduction
Habitat and Distribution
Chrysalidocarpus leucomallus (now officially classified as Dypsis lutescens) is native to Madagascar, specifically the humid eastern forests of the island. It naturally grows in tropical and subtropical regions with consistent rainfall and moderate temperatures. In its native habitat, it can be found in forest understories and clearings.
Native Continent
The palm is endemic to the African continent, specifically the island of Madagascar, which is renowned for its high level of endemic palm species.
Taxonomic Classification
- Kingdom: Plantae
- Division: Tracheophyta
- Class: Liliopsida
- Order: Arecales
- Family: Arecaceae
- Genus: Dypsis (formerly Chrysalidocarpus)
- Species: D. lutescens (formerly C. leucomallus)
Synonyms
- Chrysalidocarpus lutescens
- Areca lutescens
- Dypsis lutescens (current accepted name)
Common Names
- Areca Palm
- Butterfly Palm
- Yellow Palm
- Cane Palm
- Golden Cane Palm
- Bamboo Palm
- Madagascar Palm
Global Expansion
Since the 19th century, Chrysalidocarpus leucomallus has been cultivated worldwide as an ornamental plant. It gained significant popularity in the 1970s as an indoor houseplant in Europe and North America. Today, it is commercially grown in Florida, Hawaii, Central America, and throughout Southeast Asia. It has become one of the most widely cultivated palms globally due to its adaptability, attractive appearance, and air-purifying qualities. In tropical regions, it has naturalized in some areas, though it is not generally considered invasive.
2. Biology and Physiology
Morphology
Stem/Trunk:
- Multiple clustering stems (canes) growing from a single base
- Adult height typically ranges from 6-12 feet (1.8-3.7 m) indoors, up to 25 feet (7.6 m) outdoors
- Stems are slender, bamboo-like, ringed with leaf scars
- Yellow-green in color, becoming more yellow with age and sun exposure
- Diameter ranges from 1-3 inches (2.5-7.6 cm)
Leaves:
- Arching, pinnate (feather-like) fronds
- Each frond measures 4-8 feet (1.2-2.4 m) long
- Composed of 40-60 leaflets per frond
- Leaflets are narrow, lanceolate, 12-24 inches (30-60 cm) long
- Bright to medium green on top, slightly paler underneath
- New fronds emerge from a central growing point (crown shaft)
- Petioles (leaf stalks) are smooth with minimal or no spines
Flower Systems:
- Inflorescences emerge from among the leaf bases
- Branched flowering stalks (spadices) with multiple rachillae
- Small, yellow-white flowers arranged along rachillae
- Monoecious species (male and female flowers on the same plant)
- Male flowers typically mature before female flowers (protandry)
- Flowering occurs primarily in spring and early summer
- Flowers are insect-pollinated, primarily by bees and beetles
Life Cycle
-
Seed Stage: Seeds germinate when conditions are suitable, typically requiring temperatures of 75-85°F (24-29°C) and high humidity.
-
Seedling Stage: After germination, the first embryonic leaf (eophyll) emerges, followed by development of true pinnate leaves. This stage lasts 1-2 years.
-
Juvenile Stage: The palm develops multiple stems and begins establishing its characteristic clumping growth habit. Plants are not yet reproductive. This stage lasts 3-5 years.
-
Mature/Reproductive Stage: At approximately 6-7 years of age, the palm begins flowering and producing fruit. It continues to produce new stems from the base.
-
Senescence: Individual stems have a lifespan of approximately 10-15 years, after which they decline and are replaced by new basal growth. The clump as a whole can persist for decades.
Specific Adaptations to Different Climate Conditions
-
Drought Adaptation: While preferring consistent moisture, it can withstand short periods of drought by slowing growth and reducing transpiration.
-
Light Adaptation: Capable of growing in various light conditions from full sun to partial shade, adjusting leaf size and color accordingly (larger, darker leaves in shade; smaller, yellower leaves in sun).
-
Temperature Adaptation: Cannot tolerate freezing temperatures, but can adjust metabolic processes to survive brief cold periods down to about 35°F (1.7°C).
-
Wind Resistance: Flexible stems and fronds allow bending in high winds rather than breaking.
-
Salt Tolerance: Moderate tolerance to salt spray but poor tolerance to salt in soil or irrigation water.
-
Resource Allocation: During stress periods, the plant will sacrifice older fronds to preserve newer growth.
3. Reproduction and Propagation
Seed Reproduction
Seed Morphology and Diversity
- Fruits mature from green to yellow to black
- Oval to round drupes, approximately 0.5-0.75 inches (1.3-1.9 cm) in diameter
- Single seed per fruit with thin mesocarp layer
- Seeds have hard endocarp with basal embryo
- Seed color ranges from light brown to dark brown
- Ruminate endosperm with characteristic pattern
Detailed Seed Collection and Viability Testing
- Collect fruits when fully ripe (black in color)
- Remove pulp by soaking in water for 24-48 hours and rubbing away flesh
- Clean seeds thoroughly to prevent fungal growth
- Viability testing:
- Float test: Viable seeds sink in water
- Cut test: Viable seeds have firm, white endosperm
- Tetrazolium test: Professional method using 1% tetrazolium chloride solution
- Freshly harvested seeds typically show 70-85% viability
- Viability decreases significantly after 3-6 months
Pre-germination Treatments
- Scarification: Lightly sand one side of the seed coat to thin the hard covering
- Hot water treatment: Soak seeds in water at 100-110°F (38-43°C) for 24-48 hours, changing water daily
- Hydrogen peroxide soak: 3% solution for 24 hours to disinfect and potentially speed germination
- Fungicide treatment: Optional soak in fungicide solution to prevent damping off
Step-by-step Germination Techniques
- Prepare germination medium: Mix equal parts perlite and peat moss or use fine vermiculite
- Maintain consistent temperature of 80-85°F (27-29°C)
- Place seeds horizontally, half-buried in medium
- Cover with clear plastic to maintain 80-90% humidity
- Position in bright, indirect light
- Mist or lightly water to keep medium consistently moist but never soggy
- Watch for first sign of germination (emergence of radicle)
- Once radicle appears, ensure consistent moisture until first leaf emerges
Germination Difficulty
Moderate difficulty level. Primary challenges include:
- Inconsistent germination periods (some seeds germinate quickly, others take months)
- Susceptibility to fungal issues during germination
- Specific temperature and humidity requirements
- Reduced viability with seed age
Germination Time
- First signs of germination: 1-3 months
- Complete germination (first leaf emergence): 2-6 months
- Germination rate peaks at 3 months, with stragglers continuing up to 8 months
Seedling Care and Early Development Stages
-
Initial Emergence (0-3 months after germination):
- Maintain high humidity (70-80%)
- Temperature steady at 75-80°F (24-27°C)
- Bright, indirect light
- Protection from drafts and temperature fluctuations
-
Early Establishment (3-6 months):
- First true leaf develops
- Begin light fertilization with diluted balanced fertilizer
- Gradually reduce humidity to 60-70%
- Maintain consistent moisture
-
Juvenile Development (6-12 months):
- Multiple leaves develop
- Transplant to individual 4-inch pots with well-draining palm mix
- Regular light fertilization every 6-8 weeks
- Gradually increase light intensity
Advanced Germination Techniques
Hormonal Treatments for Germination Enhancement:
- Gibberellic acid (GA3) application: 500-1000 ppm solution soak for 24 hours
- Cytokinin treatments: 50-100 ppm benzyladenine solution
- Commercial seed primers containing balanced growth regulators
- Note: These treatments can increase germination rates by 15-25% but require careful application
4. Cultivation Requirements
Light Requirements
Species-specific Light Tolerance Ranges
- Optimal light: Bright, filtered light (10,000-15,000 lux)
- Minimum light for survival: Moderate indirect light (2,500-5,000 lux)
- Maximum light tolerance: Morning direct sun with afternoon shade
- Light duration: 12-14 hours optimal for maximum growth
Seasonal Light Variations and Management
- Spring/Summer: Protect from intense midday sun (10am-4pm)
- Fall/Winter: Maximize light exposure; move to brightest location available
- Northern Hemisphere considerations: South or east-facing windows ideal
- Southern Hemisphere considerations: North or east-facing windows ideal
Artificial Lighting for Indoor Cultivation
- Recommended fixtures: Full-spectrum LED grow lights or T5 high-output fluorescents
- Distance from plants: 12-24 inches (30-60 cm) depending on light intensity
- Duration: 12-14 hours daily
- Light spectrum: Higher blue spectrum (5000-6500K) for foliage development
- Minimum effective illumination: 800-1000 foot-candles
Temperature and Humidity Management
Optimal Temperature Ranges
- Daytime optimal: 75-85°F (24-29°C)
- Nighttime optimal: 65-70°F (18-21°C)
- Growth slows below: 60°F (15.5°C)
- Damage begins below: 45°F (7°C)
- Fatal temperatures: Below 35°F (1.7°C) for prolonged periods
Cold Tolerance Thresholds with Hardiness Zone Maps
- USDA Hardiness Zone minimum: 10a (30-35°F / -1.1 to 1.7°C)
- Recommended safe cultivation zones: 10b-12
- Marginal zones with protection: 9b
- European Garden Flora zones: H1-H2
- Australian zones: 2-4
Humidity Requirements and Modification Techniques
- Optimal humidity range: 50-70%
- Minimum acceptable humidity: 40%
- Signs of low humidity stress: Brown leaf tips, leaf curling
-
Humidity enhancement methods:
- Grouping plants together
- Use of humidity trays (pebbles with water)
- Room humidifiers
- Regular misting (morning hours preferred)
- Placement away from heating/cooling vents
Soil and Nutrition
Ideal Soil Composition and pH Values
- Optimal pH range: 6.0-6.5 (slightly acidic)
- Soil texture: Light, well-draining but moisture-retentive
-
Recommended mix ratio:
- 2 parts quality potting soil
- 1 part perlite or pumice
- 1 part coir or fine bark
- Optional: 10% charcoal to improve drainage
- Container considerations: Terracotta pots provide better aeration than plastic
- Drainage layer: 1-2 inches of coarse material at pot bottom
Nutrient Requirements Through Growth Stages
-
Seedling stage (0-12 months):
- Low nitrogen (N), moderate phosphorus (P), low potassium (K)
- NPK ratio approximately 3-1-2
- Quarter-strength applications monthly
-
Juvenile stage (1-3 years):
- Moderate N, moderate P, moderate K
- NPK ratio approximately 3-1-3
- Half-strength applications every 6-8 weeks
-
Mature stage (3+ years):
- Moderate N, low P, high K
- NPK ratio approximately 3-1-4
- Full-strength applications every 2-3 months
Organic vs. Synthetic Fertilization Approaches
Organic options:
- Composted manure (aged at least 6 months)
- Fish emulsion (diluted 1:10)
- Seaweed extract
- Worm castings as top dressing
- Advantages: Slow release, improved soil structure, reduced risk of fertilizer burn
Synthetic options:
- Slow-release pellets formulated for palms
- Water-soluble complete fertilizers
- Palm-specific fertilizers with micronutrients
- Advantages: Precise nutrient ratios, immediate availability
Micronutrient Deficiencies and Corrections
-
Magnesium deficiency:
- Symptoms: Yellow bands along leaf margins
- Correction: Epsom salts solution (1 tbsp per gallon) as foliar spray or soil drench
-
Manganese deficiency:
- Symptoms: Frizzle top (new leaves emerge stunted and distorted)
- Correction: Manganese sulfate application
-
Iron deficiency:
- Symptoms: Interveinal chlorosis (yellowing between veins)
- Correction: Iron chelate applications, lower soil pH if above 6.5
-
Boron deficiency:
- Symptoms: Hook leaf (bent leaf tips), abnormal root development
- Correction: Very dilute boric acid solution (use with extreme caution)
Water Management
Irrigation Frequency and Methodology
-
Growing season (spring/summer):
- Water when top 1-2 inches of soil feels dry
- Typically every 3-5 days depending on conditions
- Water thoroughly until it flows from drainage holes
-
Dormant season (fall/winter):
- Allow top 2-3 inches to dry between waterings
- Typically every 7-10 days
- Reduce volume slightly but still water thoroughly
-
Irrigation methods:
- Hand watering preferred for container specimens
- Drip irrigation effective for landscape plants
- Avoid overhead irrigation when possible to prevent fungal issues
Drought Tolerance Assessment
- Short-term drought resistance: Moderate
- Recovery capacity: Good if drought is not prolonged
-
Visible drought stress indicators:
- Leaflet folding
- Loss of glossiness
- Slight drooping of fronds
- Slowed or stopped new growth
-
Emergency recovery protocol after drought:
- Gradual reintroduction of water
- Removal of severely damaged fronds
- Temporary increase in humidity
- Light foliar feeding
Water Quality Considerations
- Sensitivity to chlorine/chloramine: Moderate
- Fluoride sensitivity: High - can cause leaf tip burn
- Water temperature: Should be room temperature (60-75°F/15-24°C)
-
Ideal water types (in descending order):
- Rainwater
- Filtered water
- Aged tap water (24+ hours to allow chlorine dissipation)
- Distilled water (supplemented with small amount of fertilizer)
-
Problematic water types:
- Hard water (high mineral content)
- Softened water (often high in sodium)
- Heavily chlorinated municipal water
Drainage Requirements
-
Essential drainage characteristics:
- Containers must have multiple drainage holes
- No standing water in saucers or cache pots
- Soil should not remain soggy for more than a few hours after watering
-
Root rot indicators:
- Yellowing of multiple fronds simultaneously
- Foul smell from soil
- Dark, mushy roots when examined
-
Preventative measures:
- Elevated pots for airflow beneath
- Terra cotta pots for moisture wicking
- Coarse drainage layer in pot bottom
- Proper soil mix with adequate aeration components
5. Diseases and Pests
Common Problems in Growing
Physiological Disorders:
-
Leaf Tip Burn:
- Causes: Low humidity, fluoride toxicity, salt buildup
- Prevention: Maintain humidity, leach soil periodically, use non-fluoridated water
-
Yellowing Fronds:
- Causes: Natural aging, overwatering, nutrient deficiencies
- Prevention: Remove only completely yellow fronds, adjust watering, fertilize appropriately
-
Stunted Growth:
- Causes: Insufficient light, root binding, poor nutrition
- Prevention: Increase light exposure, repot when needed, implement proper fertilization
-
Failure to Thrive After Repotting:
- Causes: Transplant shock, root damage, inappropriate soil mix
- Prevention: Minimize root disturbance, repot during active growth season, use proper soil
Identification of Diseases and Pests
Fungal Diseases:
-
Leaf Spot (Bipolaris/Exserohilum spp.)
- Appearance: Dark brown/black spots with yellow halos
- Conditions favoring: High humidity, poor air circulation, overhead watering
- Progression: Spots enlarge and coalesce, causing leaf necrosis
-
Fusarium Wilt (Fusarium oxysporum)
- Appearance: One-sided yellowing and wilting of fronds
- Conditions favoring: Overwatering, poor drainage, contaminated soil
- Progression: Advances from lower to upper fronds, often fatal
-
Phytophthora Bud Rot (Phytophthora palmivora)
- Appearance: Central growing point turns brown/black
- Conditions favoring: Water pooling in crown, high humidity, overhead irrigation
- Progression: New growth dies, infection moves downward, often fatal
-
Thielaviopsis Trunk Rot (Thielaviopsis paradoxa)
- Appearance: Dark lesions on trunk, fronds wilt suddenly
- Conditions favoring: Trunk injuries, high humidity
- Progression: Rapid decline, trunk tissue becomes soft and discolored
Bacterial Diseases:
-
Bacterial Bud Rot (Erwinia spp.)
- Appearance: Water-soaked lesions in central bud, foul odor
- Conditions favoring: Overhead irrigation, high temperatures
- Progression: Crown collapse, death of affected stems
Common Pests:
-
Spider Mites (Tetranychus spp.)
- Identification: Fine webbing, stippled yellowing of leaves
- Visible signs: Tiny moving dots on leaf undersides, magnification needed
- Damage: Leaf discoloration, reduced vigor, premature leaf drop
-
Scale Insects (various species)
- Identification: Brown or white bumps along stems and leaf undersides
- Visible signs: Immobile shell-like coverings, sticky honeydew
- Damage: Yellowing leaves, sooty mold growth, stunted growth
-
Mealybugs (Pseudococcus spp.)
- Identification: White cottony masses in leaf axils and undersides
- Visible signs: Waxy filaments, colony formation
- Damage: Growth distortion, honeydew, sooty mold
-
Palm Aphids (Cerataphis spp.)
- Identification: Clusters of small insects on new growth
- Visible signs: Honeydew, black sooty mold
- Damage: Distortion of new growth, weakening of plant
-
Palm Leaf Skeletonizer (Homaledra spp.)
- Identification: Transparent "windows" in leaves
- Visible signs: Caterpillar feeding, silk webbing
- Damage: Aesthetic damage to foliage, reduced photosynthesis
Environmental and Chemical Protection Methods
Cultural and Environmental Controls:
-
Disease Prevention:
- Maintain proper spacing for air circulation
- Water at soil level to keep foliage dry
- Sterilize tools between plants
- Remove and dispose of infected plant material
- Quarantine new plants for 4 weeks
- Use pasteurized potting media
-
Pest Prevention:
- Regular inspection of plants (weekly)
- Quarantine new acquisitions
- Maintain optimal growing conditions
- Increase humidity but improve air circulation
- Use yellow sticky traps for early detection
- Provide adequate spacing between plants
Biological Controls:
-
Beneficial Insects:
- Ladybugs (Coccinellidae) for aphid control
- Lacewings (Chrysoperla spp.) for multiple pests
- Predatory mites (Phytoseiulus persimilis) for spider mite control
- Parasitic wasps (Encarsia formosa) for whitefly
-
Microbial Treatments:
- Bacillus thuringiensis (BT) for caterpillar pests
- Beauveria bassiana for various insect pests
- Beneficial nematodes for soil-dwelling larvae
Chemical Controls:
-
Organic/Lower-Toxicity Options:
- Horticultural oils (1-2% solution) for scale and mites
- Insecticidal soaps for soft-bodied pests
- Neem oil (0.5-1% solution) as broad-spectrum treatment
- Diatomaceous earth for crawling insects
-
Synthetic Options (when necessary):
- Systemic insecticides for severe infestations
- Fungicides containing chlorothalonil for fungal leaf spots
- Copper-based fungicides for bacterial diseases
- Note: Always follow label instructions precisely
-
Application Guidelines:
- Test on small area first
- Apply in early morning or evening
- Ensure thorough coverage including leaf undersides
- Repeat treatments as labeled (typically 7-14 days)
- Rotate chemical classes to prevent resistance
6. Indoor Palm Growing
Specific Care in Housing Conditions
Optimal Placement:
- East or south-facing windows with filtered light
- 3-5 feet from windows for indirect bright light
- Avoid proximity to heating/AC vents, fireplaces, exterior doors
- Maintain minimum 8-foot ceiling clearance for mature specimens
- Position away from high-traffic areas to prevent leaf damage
Indoor Microclimate Management:
- Use humidifiers during winter months to maintain 50%+ humidity
- Provide saucers with pebbles and water for localized humidity
- Group with other plants to create humid microclimate
- Monitor and maintain temperatures between 65-80°F (18-27°C)
- Shield from cold drafts and hot air currents
- Provide occasional gentle air movement with ceiling fan on lowest setting
Specialized Indoor Maintenance:
- Dust leaves bi-weekly with damp cloth to maintain photosynthesis
- Rotate plant quarterly for even growth
- Avoid leaf shining products (can clog stomata)
- Provide balanced liquid fertilizer at 1/4-1/2 strength monthly
- Flush soil thoroughly every 2-3 months to prevent salt buildup
- Trim damaged fronds at base using clean, sharp pruners
- Maintain consistent watering schedule (typically weekly)
Enhancing Indoor Aesthetics:
- Use decorative containers that complement décor
- Consider containers 2-4 inches larger than root ball
- Complementary underplantings with compatible indoor plants
- Maintain symmetrical form through selective pruning
- Display single specimens as focal points or group for tropical effect
Replanting and Wintering
Repotting Protocol:
-
Timing:
- Best performed in spring (March-May)
- When roots circle pot interior or emerge from drainage holes
- Typically every 2-3 years for young plants, 3-5 years for mature
- Avoid repotting during winter dormancy
-
Container Selection:
- Choose pot 2-4 inches larger in diameter than current
- Ensure multiple drainage holes
- Terra cotta provides better aeration and moisture regulation
- Glazed ceramic or decorative pots require extra attention to drainage
- Heavy containers provide stability for top-heavy specimens
-
Repotting Process:
- Water thoroughly 24 hours before repotting
- Prepare fresh soil mix in advance
- Gently remove from current pot, disturbing roots minimally
- Inspect and trim only damaged/diseased roots
- Place at same soil level as previously grown
- Firm soil gently without compacting
- Water thoroughly after repotting
- Place in shade for 1-2 weeks for recovery
-
Post-Repotting Care:
- Reduce fertilization for 4-6 weeks
- Maintain slightly higher humidity if possible
- Shield from intense light until established
- Resume normal care once new growth appears
Winter Care:
-
Light Adjustments:
- Move to brightest available location
- Consider supplemental grow lights (12-14 hours daily)
- Clean windows to maximize light penetration
- Rotate plant weekly for even light exposure
-
Water Modifications:
- Reduce watering frequency by approximately 30-50%
- Allow soil to dry slightly more between waterings
- Water with room temperature water to prevent shock
- Avoid fertilization during November-February
-
Temperature Considerations:
- Maintain minimum night temperatures above 60°F (15.5°C)
- Protect from cold drafts from windows, doors
- Keep away from heating vents and radiators
- Use draft guards or plastic window insulation if needed
-
Humidity Management:
- Critical during winter heating season
- Target 50%+ humidity when possible
- Use room humidifiers, grouping techniques
- Mist foliage in morning hours only
- Avoid misting if ambient temperature is below 65°F (18°C)
7. Landscape and Outdoor Cultivation
Cold Climate Cultivation Strategies
Cold Hardiness
- Absolute minimum temperature tolerance: 30-32°F (−1 to 0°C) briefly
- Leaf damage threshold: 35-40°F (1.7-4.4°C) for prolonged exposure
- Fatal temperature threshold: Below 28°F (−2.2°C) for more than 2-3 hours
- Recovery potential: Good from minor frost damage, poor from severe damage
- Microclimate considerations: Heat-retaining walls, south exposures, overhead protection
Winter Protection
-
Temporary structures:
- Frame and plastic mini-greenhouse structures
- Burlap wrapping with mulch buffer
- Frost cloth coverings (minimum 4oz weight)
- Christmas lights (incandescent) within coverings for heat
-
Root zone protection:
- 4-6 inch (10-15 cm) mulch layer over root zone
- Extension of mulch 12-18 inches (30-45 cm) beyond drip line
- Temporary raised border to contain additional winter mulch
-
Anti-desiccation measures:
- Anti-transpirant sprays applied before cold weather
- Adequate hydration before first freeze
- Wind barriers on prevailing winter wind side
Hardiness Zone
- USDA primary recommendation: Zones 10a-12b
- Marginal zones with protection: 9b
- Container cultivation with winter protection: Zones 8b-9a
- Unsuitable for permanent landscape planting: Zones 8a and below
- Microclimate exceptions: Urban heat islands, coastal buffers, protected courtyards
Winter Protection Systems and Materials
-
Structural protection:
- Wooden A-frame with clear plastic covering
- PVC hoops with frost cloth covering
- Lightweight prefabricated plant tents
- Chicken wire cage filled with dry leaves or straw
-
Heating methods:
- Soil heating cables (professional installation)
- C7 or C9 Christmas light strings (traditional incandescent)
- Hot water bottles replaced nightly (small specimens)
- Composting material around base (generates heat)
-
Recommended materials:
- Agricultural frost cloth (4-8oz weight)
- Burlap (natural fiber, allows some air exchange)
- Microfoam insulation sheets
- Clear 6mil polyethylene sheeting
- Natural mulch materials (pine straw, oak leaves)
8. Establishment and Maintenance in Landscapes
Planting Techniques for Success
-
Site Selection:
- Choose locations with filtered light (30-50% shade)
- Ensure good drainage - no standing water after rain
- Allow minimum 4-6 feet spacing between plants
- Consider mature height and width (up to 25 feet tall, 10 feet wide)
- Shield from strong prevailing winds
- Avoid areas with foot traffic that may damage fronds
-
Soil Preparation:
- Test soil drainage by digging 12-inch hole and filling with water
- Water should drain within 1-2 hours for suitable planting
- Amend heavy soils with 30-40% organic matter (compost, pine bark)
- Create raised beds in areas with poor drainage
- Adjust pH to 6.0-6.5 if needed
- Incorporate slow-release palm fertilizer during preparation
-
Planting Process:
- Dig hole 2x width of root ball, same depth as container
- Score/loosen root ball if pot-bound
- Position at same level as grown in container (never deeper)
- Backfill with native soil mixed with amendments
- Create shallow basin around plant for irrigation
- Water thoroughly immediately after planting
- Apply 2-3 inch mulch layer, keeping away from stems
-
Establishment Period:
- First 3-6 months critical for success
- Water 2-3 times weekly for first month
- Gradually reduce to once weekly by 3-4 months
- Shield from intense afternoon sun during establishment
- Hold off on fertilization for 6-8 weeks
- Begin with half-strength applications after establishment
Long-term Maintenance Schedules
Year-Round Maintenance Calendar:
Spring (March-May):
- Apply slow-release palm fertilizer
- Inspect for pest issues as temperatures warm
- Remove any cold-damaged fronds
- Add fresh mulch while maintaining stem clearance
- Divide/transplant offsets if desired
- Begin weekly watering schedule if rainfall insufficient
Summer (June-August):
- Monitor for water stress during hottest periods
- Apply second fertilizer application (late June)
- Check for spider mite activity during hot, dry periods
- Consider foliar micronutrient spray if deficiencies appear
- Prune only completely brown or damaged fronds
Fall (September-November):
- Reduce watering frequency as temperatures moderate
- Apply final light fertilization (early September)
- Clean plant bases of debris before winter
- Prepare winter protection strategies
- Treat preventatively for fungal issues before wet season
Winter (December-February):
- Implement cold protection as needed
- Water only when soil becomes quite dry
- Avoid fertilization
- Monitor for cold damage after frost events
- Limit pruning to emergency removal only
Pruning Guidelines:
- Remove only completely brown fronds
- Cut close to trunk without damaging stem
- Use sharp, sterilized tools to prevent disease transmission
- Limit removal to maximum 1/3 of fronds at any time
- Focus on lower, older fronds rather than newer growth
- Avoid "hurricane" pruning (removing all but newest fronds)
Long-term Soil Management:
- Annual application of 2-3 inches organic mulch
- Soil testing every 2-3 years
- Periodic deep watering to leach salt buildup
- Aeration of compacted soils
- Mycorrhizal inoculation for established plantings
Final Short Summary
Chrysalidocarpus leucomallus (Dypsis lutescens) is a versatile, attractive palm native to Madagascar that has gained worldwide popularity as both an indoor and outdoor ornamental plant. It features multiple yellow-green cane-like stems growing in clusters with elegant arching fronds. While adaptable to various conditions, it thrives best in bright, indirect light, consistently moist but well-draining soil, and warm temperatures with moderate to high humidity.
Propagation is primarily through seeds, which require warm temperatures and high humidity to germinate over a period of 1-6 months. The palm requires regular but careful watering, protection from cold (being hardy only to USDA zones 10a-12), and benefit from regular feeding with balanced fertilizers supplemented with micronutrients, particularly magnesium, manganese, and iron. Common issues include spider mites, scale insects, and various fungal diseases, all manageable with proper cultural practices and treatments.
Whether grown indoors as an elegant houseplant or outdoors as a landscape specimen in suitable climates, Chrysalidocarpus leucomallus rewards growers with its graceful form, air-purifying qualities, and relatively straightforward care requirements, making it an excellent choice for both beginning and experienced palm enthusiasts.